Why Your Invisalign Trays Aren't Fitting — And What to Do About It
Invisalign trays not fitting right in Long Beach? Learn why gaps happen, what tracking means, and when refinements are needed. Get answers from our dental team.
Read More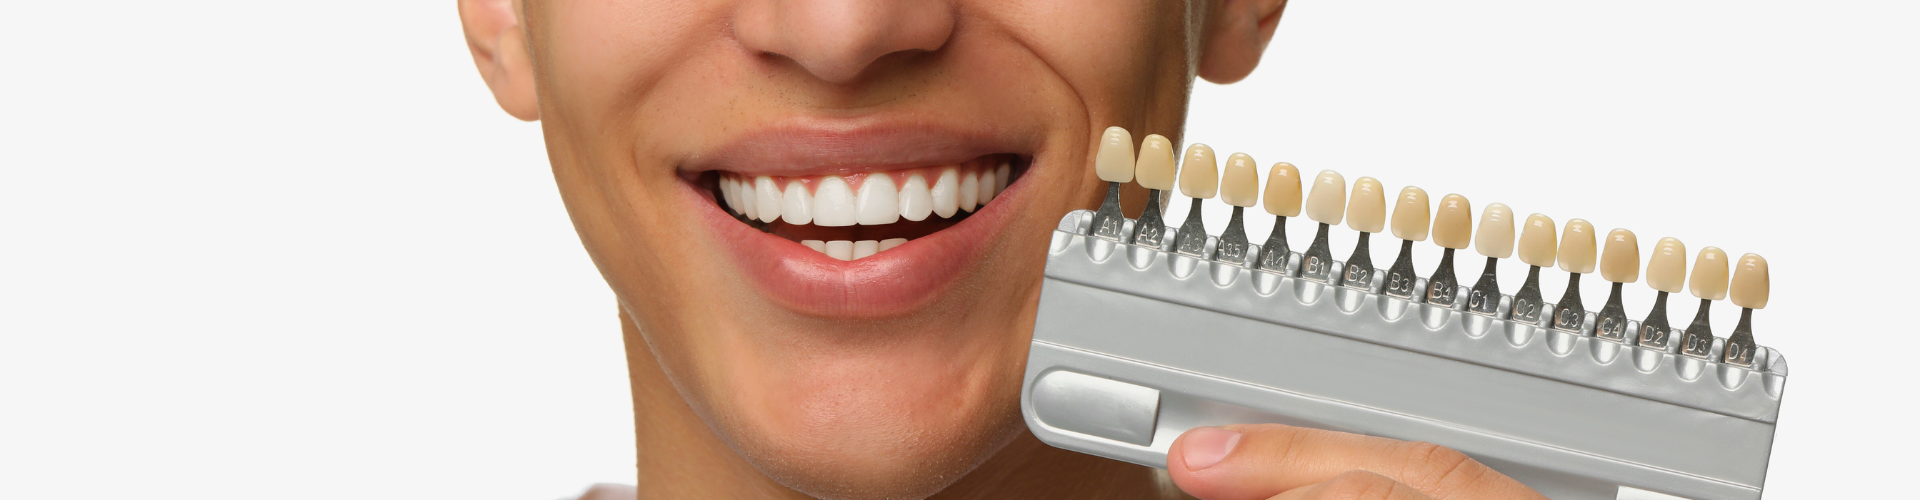
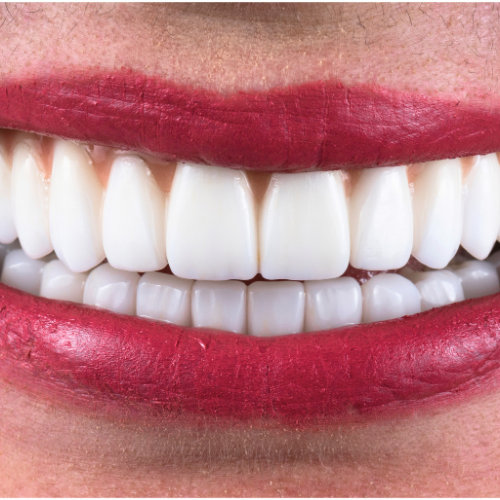
If you have ever admired someone’s smile and wondered how their teeth look so natural and well balanced, there is a good chance veneers played a role. Veneers are one of the most thoughtful and detail driven treatments in modern dentistry. They are not mass produced shells that simply get glued on. Each veneer is custom crafted to fit a specific tooth, a specific bite, and a specific smile.
At Long Beach Family Dentist, veneers are approached as a collaboration between dentist, patient, and dental laboratory. The goal is not perfection in a fake or overly bright sense. The goal is a smile that looks like it belongs to you. Understanding how veneers are made helps set realistic expectations and shows why the process is worth the care and time involved.
Below, we walk through how veneers are created, what materials are used, and how long the entire process usually takes.
The process of making dental veneers begins long before anything is placed on your teeth. It starts with planning, communication, and careful evaluation. This is where the foundation of a natural looking result is built.
Step 1: The consultation and smile planning
Every veneer case starts with a conversation. Your dentist looks at:
This step is essential. Veneers should complement your face, not overpower it. Some patients want subtle improvements while others want a more noticeable change. There is no one correct answer. What matters is that the plan fits you.
Photos, digital scans, and sometimes impressions are taken. These records help guide both the dentist and the dental laboratory.
Step 2: Tooth preparation
Once the plan is set, the teeth receiving veneers are gently prepared. This usually involves removing a very thin layer of enamel from the front surface of the tooth. The amount removed is minimal and is just enough to allow the veneer to sit flush with the surrounding teeth.
This step is important for a few reasons:
Local anesthetic is often used to keep you comfortable, though many patients are surprised by how mild this step feels.
Step 3: Impressions or digital scans
After preparation, your dentist takes an impression or a digital scan of your teeth. This captures the exact shape, contours, and alignment of your smile. Accuracy here is critical. Even small details matter when veneers are being crafted.
The impression or scan is sent to a dental laboratory, where skilled technicians begin the fabrication process. These technicians are artists as much as they are scientists. They use your dentist’s instructions, photos, and measurements to design veneers that match your smile.
Step 4: Temporary veneers
While your permanent veneers are being made, temporary veneers may be placed. These protect your prepared teeth and give you a preview of how your new smile may look. Temporaries also allow you to experience changes in shape and size, which can be adjusted if needed before the final veneers are placed.
This stage is helpful for feedback. If something feels off, your dentist can communicate adjustments to the lab.
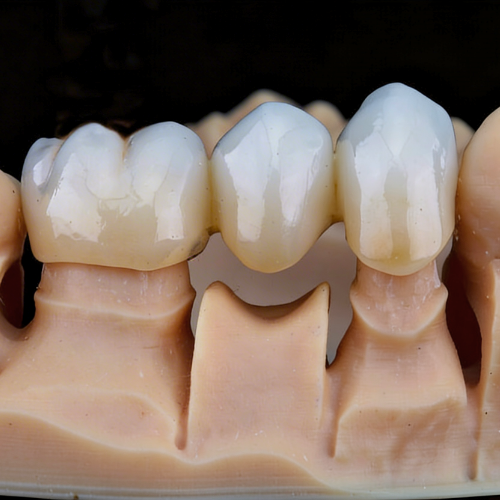
Step 5: Fabrication at the dental lab
At the lab, veneers are carefully built layer by layer. This is not a quick process. The technician shapes the veneer, adds subtle color variations, and refines the surface so it reflects light like natural enamel.
Each veneer is made specifically for one tooth. No two are identical, just like natural teeth.
Step 6: Try in and bonding
Once the veneers are ready, you return to the office for placement. Your dentist tries each veneer on your teeth to check:
Minor adjustments can still be made at this stage. When everything looks and feels right, the veneers are bonded to your teeth using a strong dental adhesive. This creates a secure and long lasting connection.
After bonding, your dentist makes final refinements and checks your bite to ensure comfort.
Not all veneers are made from the same materials. The material chosen affects how veneers look, feel, and perform over time. Your dentist will recommend an option based on your needs, habits, and goals.
Porcelain veneers
Porcelain is the most common and widely used material for veneers. It closely mimics the translucency and light reflection of natural enamel.
Key benefits of porcelain veneers include:
Porcelain veneers are custom crafted in a dental laboratory. This allows for a high level of detail and customization. For many patients, porcelain offers the best balance of beauty and longevity.
Ceramic veneers
Ceramic veneers are similar to porcelain and are often grouped together. Advanced ceramics allow for precise shaping and excellent color matching. They are especially useful when addressing more complex cosmetic concerns.
Ceramic materials can be adjusted to vary in translucency, which helps create a realistic depth to the tooth.
Composite resin veneers
Composite veneers are made from tooth colored resin material. These can sometimes be placed directly in the dental office rather than being fabricated in a lab.
Composite veneers may be recommended in certain cases because:
However, composite veneers may not last as long as porcelain and can be more prone to staining over time. They can still produce attractive results, especially for minor corrections.
How material choice affects the final look
The material influences:
Your dentist considers your smile goals, bite, and lifestyle when recommending a material. Someone who grinds their teeth or wants a dramatic color change may need a different approach than someone seeking subtle refinement.
One of the most common questions patients ask is how long the veneer process takes. The answer depends on the complexity of the case, the number of veneers, and the materials used.
Typical timeline for veneers
For most patients, the process follows this general timeline:
From start to finish, veneers are usually completed in two to three weeks. Some cases may take longer if adjustments are needed or if additional planning is involved.
Why the process is not rushed
Veneers are an investment in your smile. Rushing the process can lead to results that feel unnatural or uncomfortable. Taking time allows for:
This attention to detail helps ensure your veneers look good not just on day one, but for years to come.
What affects the timeline
Several factors can influence how long the process takes:
Your dentist will walk you through the expected timeline during your consultation so there are no surprises.
Custom veneers are designed specifically for your mouth. This is what separates high quality veneer work from one size fits all solutions.
Custom veneers consider:
When done well, veneers should feel like your own teeth. Many patients forget they even have them.
Veneers do not require complicated care, but they do benefit from good habits.
To help your veneers last:
With proper care, veneers can last many years while maintaining their appearance.
Veneers can address a range of concerns, including:
They are not always the right solution for every situation. That is why an honest evaluation is important. Your dentist may discuss alternatives if they better suit your oral health.
Dental veneers are a blend of art, science, and careful planning. Understanding how they are made highlights why experience and precision matter so much in achieving a natural result.
If you are considering veneers or simply want to learn whether they are a good option for your smile, the team at Long Beach Family Dentist is here to help. We take the time to listen, plan, and create results that feel authentic and comfortable.
Schedule an appointment today to explore your options and take the next step toward a smile that feels like your own.
Fresh news from the dental world


Mon 8AM - 5PM
Tue 8AM - 5PM
Wed-Thu 8AM - 5PM
Fri 8AM - 5PM
Sat 9AM - 3PM
Sun Closed
Check out what our patients are saying in Long Beach, CA...


“My favorite dentist...”
The service here is amazing and they make you feel comfortable. I'm one of those people that hates to go to the dentist and the dentists that I went to in the past were not that great with service. Overall I found my favorite dentist service now at Long Beach Family Dentist.

“Clean and friendly...”
Very clean and friendly crew. I really enjoyed myself.

“Answers any questions...”
I been a patient here for over twelve years. Andrea greeted me and got my folder set up. Toni is very friendly and answers any questions you have promptly, when I always come in she greets you with a smile and makes your appointment enjoyable. Today Jovani and Dr. Joan made this experience great. I recommend this dentist for new patients.

“A positive experience...”
Very clean and organized office! Entire staff was pleasant and friendly, and seems interested in ensuring I had a positive experience. Will definitely return! Affordable rates.
“My favorite dentist...”
The service here is amazing and they make you feel comfortable. I'm one of those people that hates to go to the dentist and the dentists that I went to in the past were not that great with service. Overall I found my favorite dentist service now at Long Beach Family Dentist.
“Clean and friendly...”
Very clean and friendly crew. I really enjoyed myself.
Check out our accreditations, sources, and relationships in the wide world of dentistry...


Check us out and follow our Long Beach, CA practice on social media...